

Creating a Tunnel Connection
Testinium Virtual Tunnel is a proxy server that provides a secure connection from Testinium’s mobile device lab and virtual browsers to your application under test or website hosted behind a corporate firewall. The secure tunnel is only accessible from our testing environment.
You can also try to whitelist our test environments’ Ip address but that would be a wide range of IP list and network engineers wouldn’t be happy about it.
Testinium Virtual Tunnel is a jar package that can be launched by a console application. You can also use CLI to run a Tunnel.
Downloading The Client
You need to go to https://testinium.io/user/account/tunnel and download the jar file.
Creating a Tunnel Connection
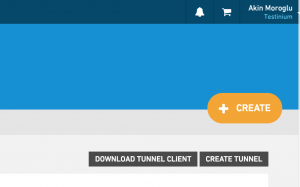
Testinium Tunnel’s page allows you to create a Tunnel Connection. Select “Create Tunnel” and you’ll be welcomed by the “Create Tunnel” page. There are 2 fields that you need to fill out.
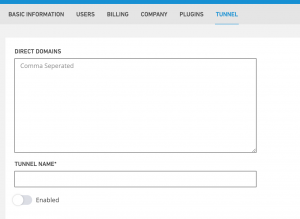
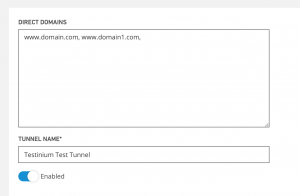
Direct Domains field is for domains that you don’t want to reach via Testinium’s Tunnel like a 3rd party application that runs behind your application (ex: Google Analytics, Hotjar, etc..).
Think about a page where Google Analytics sends analytics data to Google servers. As those requests will be sent to Google’s production servers, there’s no need to send those requests through the tunnel. You need to separate each domain by using a comma. Then you need to give a name to that Tunnel. Finally, the last step is to enable the tunnel.
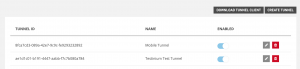
Now your tunnel is created. When you save this information, you will receive a Tunnel ID on the previous page.
Running the Tunnel
When you download the client, it will be a zip file containing all the components to run the jar file. The JAR file is in the lib folder.
There are two ways of running the Tunnel.
Command Line Interface
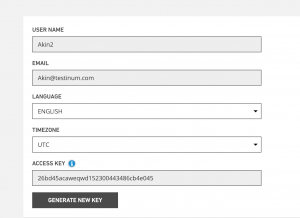
By using below command, you’ll be able to run a specific Tunnel. To get your username and Testinium access key, just go to Testinium Profile page by following this link:https://testinium.io/user/profile
java -jar tunnel-cli-1.2.jar -u username -p TestiniumAccessKey -t TunnelId
After running the command, you need to see below logs. This means that the Tunnel has started successfully.

Tunnel as Application
You can also run the Tunnel as a command line application by using the command below
Java -jar tunnel-cli-1.2.jar
Then you will be welcomed by the screen below
![]()
You can enter your credentials and select the specific tunnel by following the commands.
Ok, now everything is set up. The tunnel is created and Tunnel application is running. The last thing we should do is adding our Tunnel ID as a “Desired Capabilities” to our Selenium or Appium code.
Adding Tunnel to Desired Capabilities
In order to run your test in Testinium’s Selenium Grid, you need to add some desired capabilities. Those capabilities include the browser name, browser version and other supporting information about the test environment. To be able to proxy our request to Testinium VPN Tunnel, you need to add one more desired capability.
Below you can find the sample test code to create a RemoteWebDriver.
WebDriver driver = null;

DesiredCapabilities capabilities = new DesiredCapabilities();
capabilities.setCapability("key", KEY);
capabilities.setCapability(CapabilityType.PLATFORM, "LINUX");
capabilities.setCapability(CapabilityType.BROWSER_NAME, "firefox");
capabilities.setCapability(CapabilityType.VERSION, "64");
capabilities.setCapability(CapabilityType.TAKES_SCREENSHOT, true);
capabilities.setCapability("recordsVideo", true);
capabilities.setCapability("screenResolution", "WXGA_P");
capabilities.setCapability("testinium:tunnel.id", "8fda76d3s-089a-42e7-9c9c-fe9293232692");

try {
driver = new RemoteWebDriver(new URL("https://hub.testinium.io/wd/hub"), capabilities);
} catch (MalformedURLException e) {
e.printStackTrace();
}
Happy Testing with VPN Tunnel.